Photography 101: ISO
Photography 101: ISO
Light is an amazing thing. I once viewed Saturn through a telescope and was able to actually see its rings. I was looking at a planet that was 746 million miles away. How far away is that? Light travels at 186,000 miles per second or 670 million miles per hour. Traveling at this speed, Saturn’s light that I was seeing through that telescope had taken over an hour to reach my eyes.
And light is an amazing thing when it comes to making photographs. Whether you’re a professional photographer, a photography enthusiast, or simply own a camera, we all play by the same basic photography principles. In addition to my other biweekly posts, each month this year I’m covering a different photography basic. You can find the other posts in this series by clicking below:
- Photography 101: Exposure
- Photography 101: Aperture
- Photography 101: Depth of Field
- Photography 101: Shutter Speed
The best way to control the exposure of a photograph is to understand, and adjust accordingly, the aperture, shutter speed, and ISO. Having already covered aperture and shutter speed, let’s turn our attention to ISO.
What does ISO stand for? Nothing, actually. It’s simply the chosen short form for the name of the International Organization for Standardization.
For those of you old enough to remember using actual film in your camera, you’ll no doubt be familiar with film speed, the measure of a photographic film’s sensitivity to light. For digital cameras, the ISO setting is a similar number or index.
The lower the ISO (for example, 100 or 200), the less sensitive your camera will be to light, while the higher the ISO (for example, 1,000 or 4,000), the more sensitive your camera will be to light. With increased ISO, your camera is able to capture images in lower-light environments without having to use a flash. However, the higher the ISO, the more grain or “noise” will be noticeable in your photos.
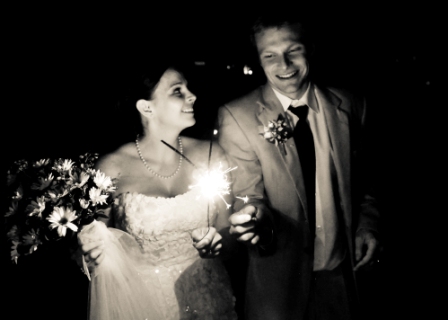
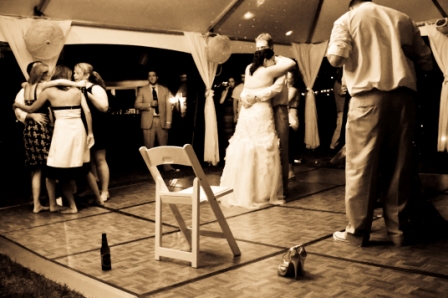
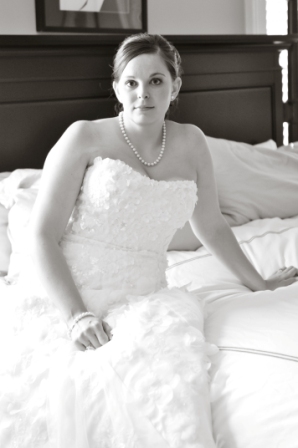
While each of the four images below is an acceptable photograph, you will notice that as the available light increases and the ISO decreases, the images become clearer and less grainy. The first photo is lit solely by sparklers, thus necessitating a higher ISO. The second is lit by incandescent bulbs which while giving off more light than the sparklers, still necessitates a high ISO. The third image is lit from the sun shining indoors through a window necessitating a medium ISO. And the fourth image is lit completely from the sun outdoors and is the brightest of the four requiring the lowest ISO.

Typically, you’ll want to use the lowest ISO possible in order to get the clearest, least grainy photograph possible. But as in most things in life, it’s all about trade off. In any given lighting situation, you will want to adjust your aperture, shutter speed, and ISO together to achieve your desired photo.
Most newer DSLR cameras have an “Auto ISO” setting in which you can set the maximum ISO, thus limiting the grain or noise in your low-light photos.